Filleting a salmon step by step
When filleting a salmon, we have to separate the meat from the backbone. Sounds easy, doesn't it? If you know the right procedure and get practice, it can be really easy. Therefore, we have described the whole procedure for you into illustrated simple steps. It will help you get the salmon from the store to the grill without any further issues.
Before you start, you need to know a few things in order to make this process as quick and smooth as possible, particularly:
- SALMON – before filleting, remove the entrails, cut off the head and tail.
- SUITABLE WORKING SURFACE - a stable and easy-to-clean work surface is essential. HDPE (high density polyethylene) boards are well suited for this as well as plastic boards. Ideally, the work surface should be large enough to fit 2 fillets next to each other.
- ROBUST AND SHARP KNIFE - our favourite is popular straight knife with a rigid blade, which we hold as a "wicked-shahp". The thin filleting knife works best for slicing smaller fish. However, in case of larger fish, the blade is difficult to handle, which often leads to meat loss!
- GOOD AND EASY - ONLY WITH KNIFE GRINDER - sharp knives are able to make light cuts. We definitely recommend a professional grinder: Work Sharp Culinary E5
Here we go:
Step 1
Prepare the salmon without its entrails, head and tail. Prepare the fish with the back (top) side of the fish facing to you and point its head to the right.
Step 2
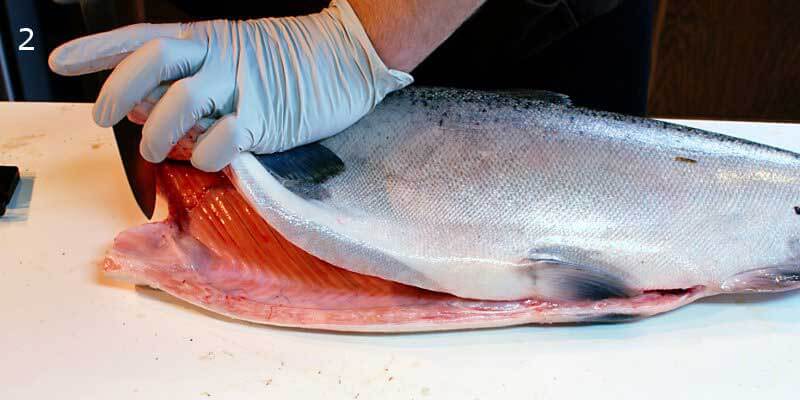
Hold the abdominal fin upwards and insert the knife on the left (upper) side of the spine behind the pectoral fin and collar.
Step 3
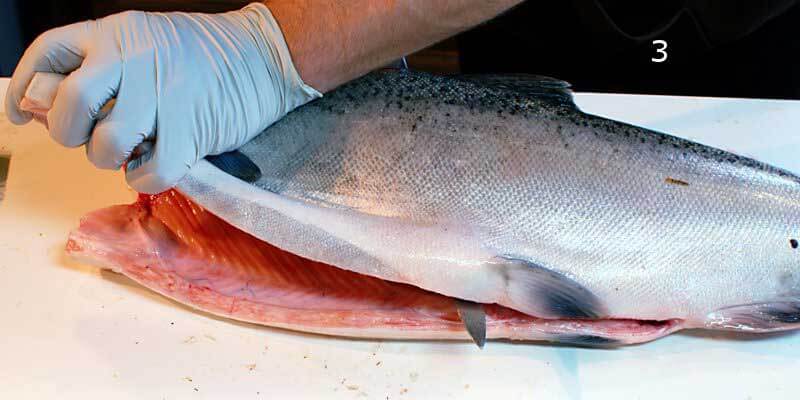
Always hold the abdominal fin up and slide the knife along the spine in a "sawing" move in and out. Make sure you always keep the knife slightly tilted towards the spine.
Step 4
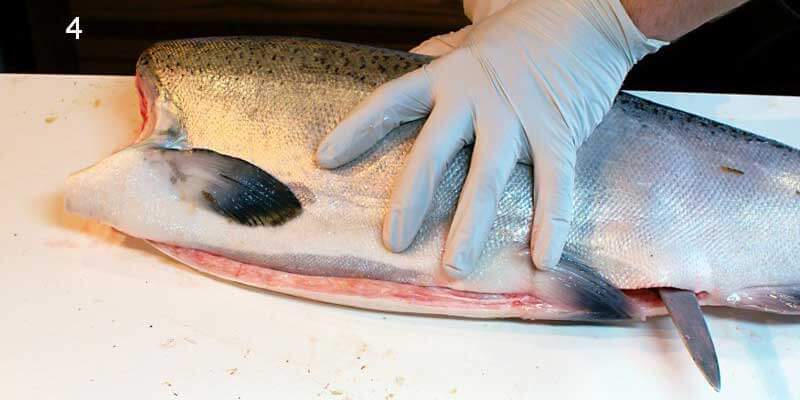
When you reach the abdomen end, move your hand away from the pectoral fin and place it on the side of the fish about halfway down the fish body. Keep a slight incline down to the spine and continue to cut the fish. When you have finished the cut, you can put the first fillet aside.
Step 5
Flip the fish so that the abdomen side faces to you, head to the right. For the second fillet, let's start the process again.
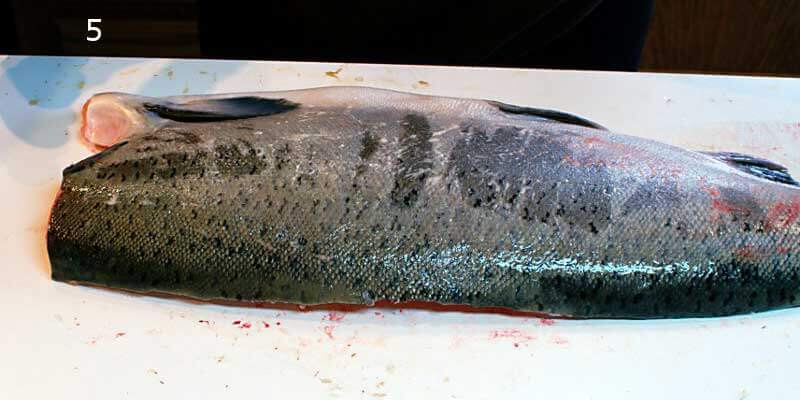
Step 6
Hold the abdominal fin up and insert the knife behind the pectoral fin and collar - on the upper right (upper) edge of the spine and start cutting.
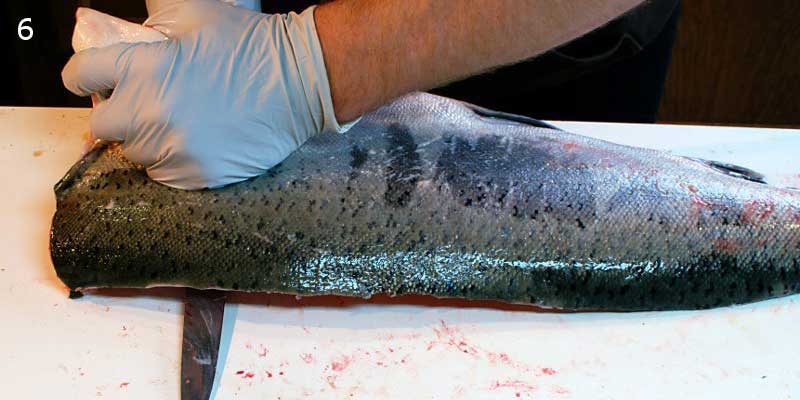
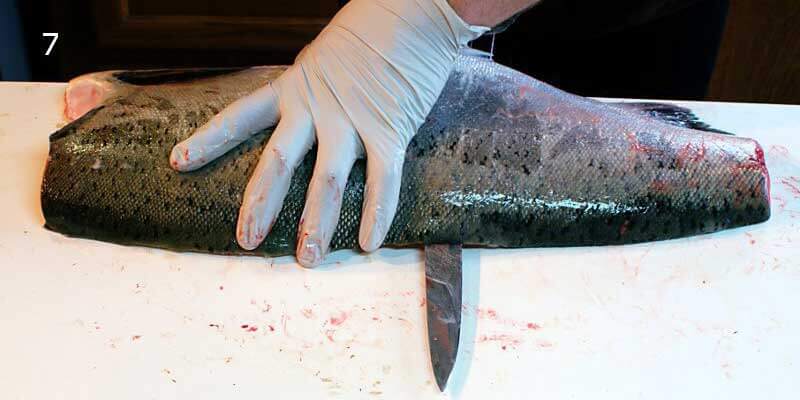
Step 7
Continue with cutting until you are close to the end of the chest, then move your hand off the collar to hold the fish about halfway down its length. Cut until the side is fully separated from the spine and you can then place the fillet on a plate.
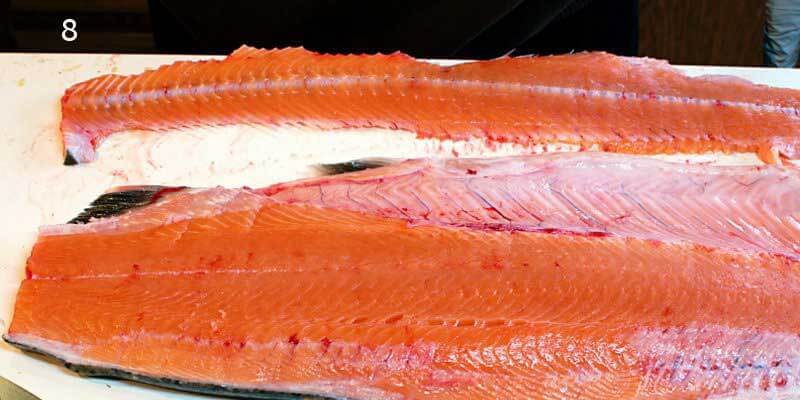
Step 8
When you're done, you should have a mostly meatless spine and 2 nice slices of salmon. In this step, you can choose, if you want to grill or bake the salmon.
Step 9
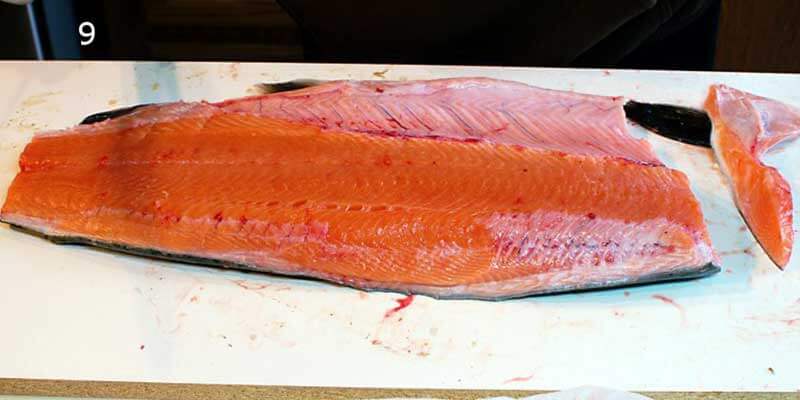
We would like to add a few more useful steps in order to remove the rib bones and the collar, so feel free to move on... Remove the collar by cutting it in a vertical line about 1/4 of the cut of the head and on the back of the sternum - do not throw these parts away because they can be also grilled well. We will just put it together in order to make it easier for us to take the next step.
Step 10
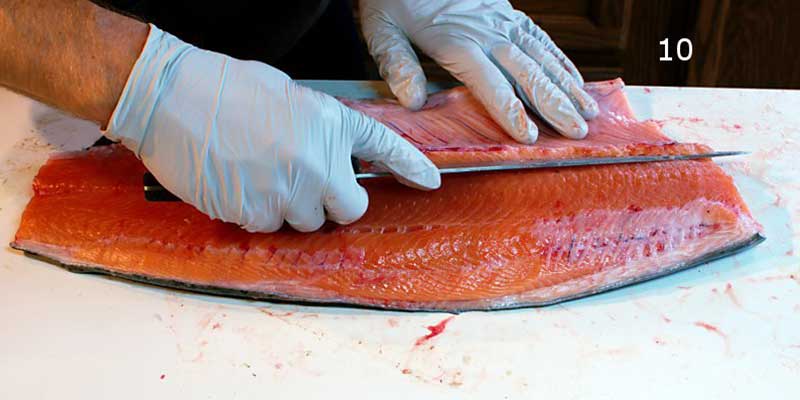
At this point, it's getting harder. Insert the knife under the rib bones and then tilt the blade into them. The common idea is to use the bones in order to prevent incision into the abdominal flesh, which will require some patience and tenderness. The easiest way how to remove these bones is to make a series of sharp moves with the knife in one direction - against the rib bones - with a slight pressure with free hand. When you reach the end of the bone (directly above the incision in the abdomen), hold the rib bone flap and cut it off in one move. Be very careful during removing the rib bones. Move the knife slowly and please do not cut yourself.
Step 11
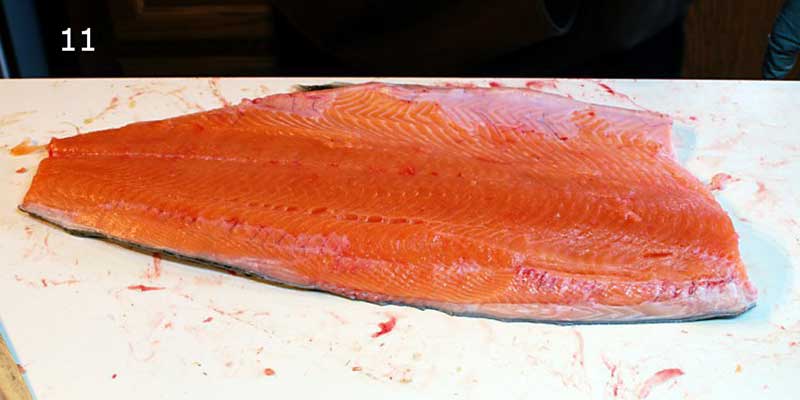
Your fillet is ready for the last seasoning. Use salt, spices and a little lemon-butter sauce.
As with the most kitchen tasks, salmon filleting requires a little practice to make it smooth and easy. Remember to always use a sharp knife and let the fish bones guide your cuts. Be sure to cut slowly, do not forget about suitable knife placement in your hand, and if something doesn't look as it should or you feel it's not right, stop cutting.
Take a look at our range of filleting knives for your safe work with any fish.
Some of the photos provided in this article are, with the permission of the author, downloaded from www.worksharptools.com
Subscribe to the newsletter
Are you interested in this article? Join other news subscribers using the form below and get the first information about news, promotions or exclusives!
We recommend from the category Filleting knives

DUE CIGNI COLT FILETTARE FLESSIBILE 2C 745/16

Helle knife
Marttiini Martef Filleting Knife 19 Stainless Steel & Martef/Rubber/Leather 836014t
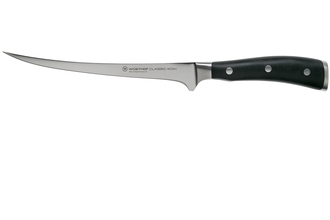
Wüsthof Solingen Classic icon Filleting Knife 18 cm, 1040333818

OTTARIO OLD HICKORY 417 Fillet Knife 6.25 "440C Blade, Hardwood Handles, Leather Sheath On1275

DUE CIGNI LINEA 1896 COLTELLO DISOSSO CM 15 - INOX 4116 MANICO PP 2C 1006 PP
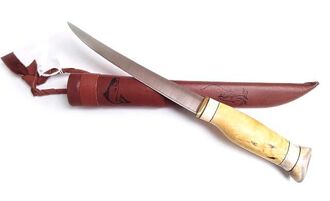
WOOD Jewel fillet knife 16 cm WJ23FP
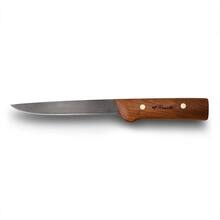
Roselli fillet knife 17.5cm UHC RW757


 Slovakia
  Czech Republic
  Austria
  Germany
  Hungary
  Romania
  Poland